
On this page
- What Actually Separates Spooky-Chic From Tacky
- Color Palettes That Read as Eerie Instead of Costume-y
- How Base Color Reads Differently Across Skin Tones
- Finishes and Textures That Add Atmosphere Without Clutter
- Motifs That Feel Intentional, Not Costume Store
- The One-Accent-Nail Rule
- Shapes and Lengths That Suit a Spooky Look
- Nail Art Techniques Worth Trying at Home
- Protecting Your Natural Nails Through the Season
- DIY at Home or a Salon Visit: Which Fits Your Set
- Halloween Nails for Different Settings
- What Tends to Push a Design Into Tacky Territory
- A Simple Approach for Planning Your Own Set
Halloween nail art tends to split into two camps. On one side there are sets so packed with pumpkins, ghosts, and neon green slime that they look more like a costume shop display than a manicure. On the other side, people play it so safe that the only nod to the holiday is a single orange stripe. Neither has to be the choice you settle for.
There is a middle ground where a set still reads as unmistakably Halloween, without tipping into novelty territory. It comes down to restraint in color, intentional placement of motifs, and finishes that add atmosphere instead of clutter.
What Actually Separates Spooky-Chic From Tacky
Before getting into specific designs, it helps to name what tends to push a look one way or the other.
- Color count. Sets that stick to two or three shades tend to look put together. Sets with five or six competing colors start to look busy no matter how well each individual detail is painted.
- Motif density. A single spider, one small bat, or a subtle web in one corner reads as intentional. Covering every nail with a different character usually reads as costume-store packaging.
- Finish consistency. Mixing high-gloss, matte, and heavy glitter across the same set without a clear plan makes the whole hand look uneven, even if each nail is technically well done.
- Line quality. Clean, deliberate lines on a web or a silhouette look elegant. Shaky or overworked line art is one of the fastest ways a design starts to look amateur, regardless of the concept behind it.
Keeping these four things in mind while planning a set is usually enough to avoid the most common missteps.
Color Palettes That Read as Eerie Instead of Costume-y
Color does more work than any individual motif. The right palette can make even a plain manicure feel seasonal, while the wrong one can undercut a detailed design.
Deep, Moody Shades
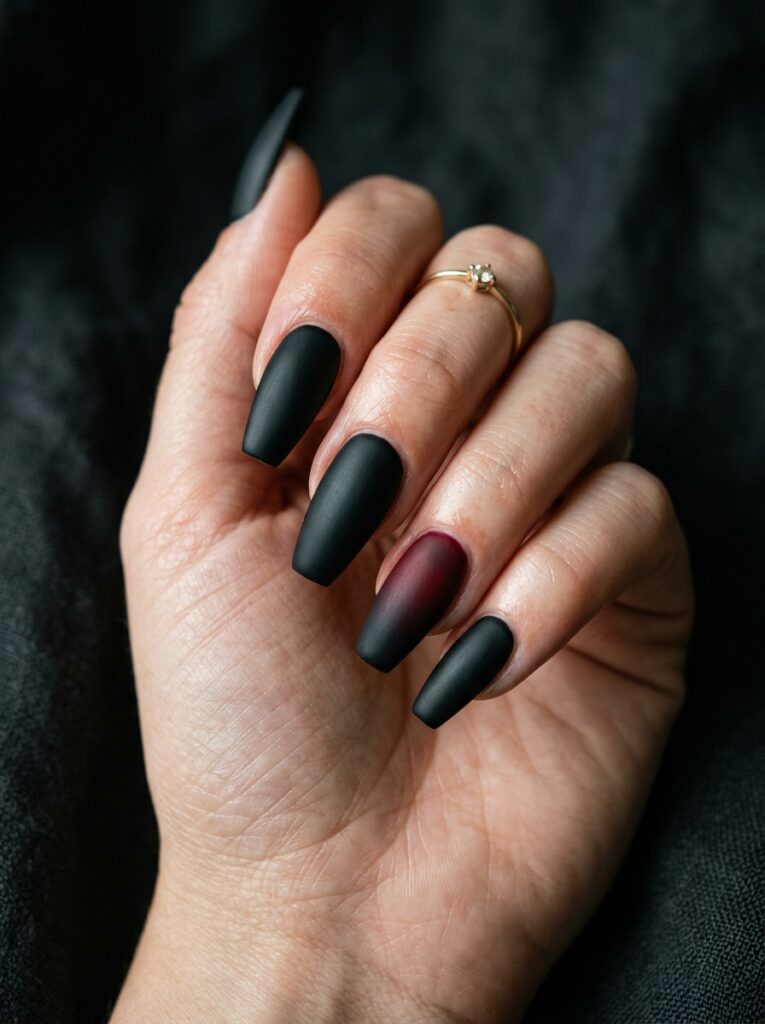
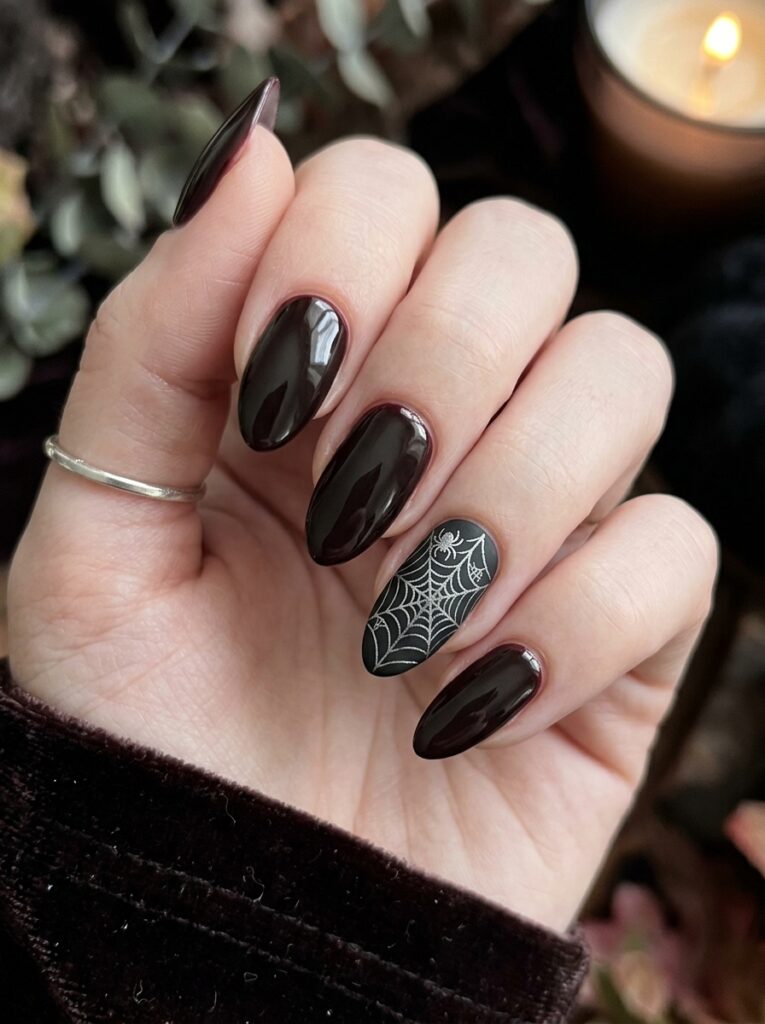
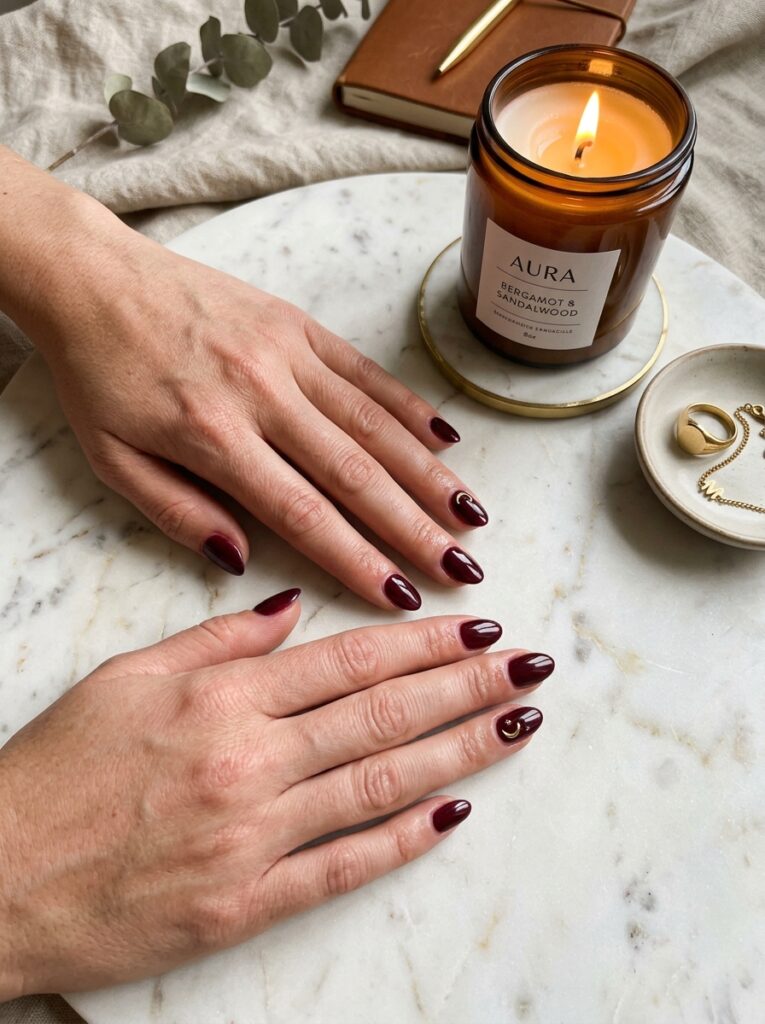
Oxblood, wine, black cherry, and forest green sit at the center of most refined Halloween sets this year. These colors carry the mood of the holiday without needing a single painted detail. A glossy oxblood on its own already reads as intentional and a little dramatic, which is part of why nail artists keep returning to it season after season.
Cool Neutrals With a Twist
A milky white, soft grey, or deep taupe base gives a design room to breathe. These neutral tones work particularly well as a canvas for line art, since the contrast between a pale base and dark linework does most of the visual work without needing extra color.
When Pastels Work
Not every Halloween look has to lean dark. A softer direction built around baby pink, lavender, or pale lilac can carry the same imagery, ghosts, bats, tiny pumpkins, in a gentler register. This approach tends to suit anyone who wants a set that still fits into daily life at work or around kids, since pastel bases read as playful rather than eerie.
Choosing one of these three directions, rather than mixing all of them, is usually the first decision worth making before anything else.
How Base Color Reads Differently Across Skin Tones
The same polish can look noticeably different depending on the undertone it sits against, and this is worth factoring in before committing to a full set.
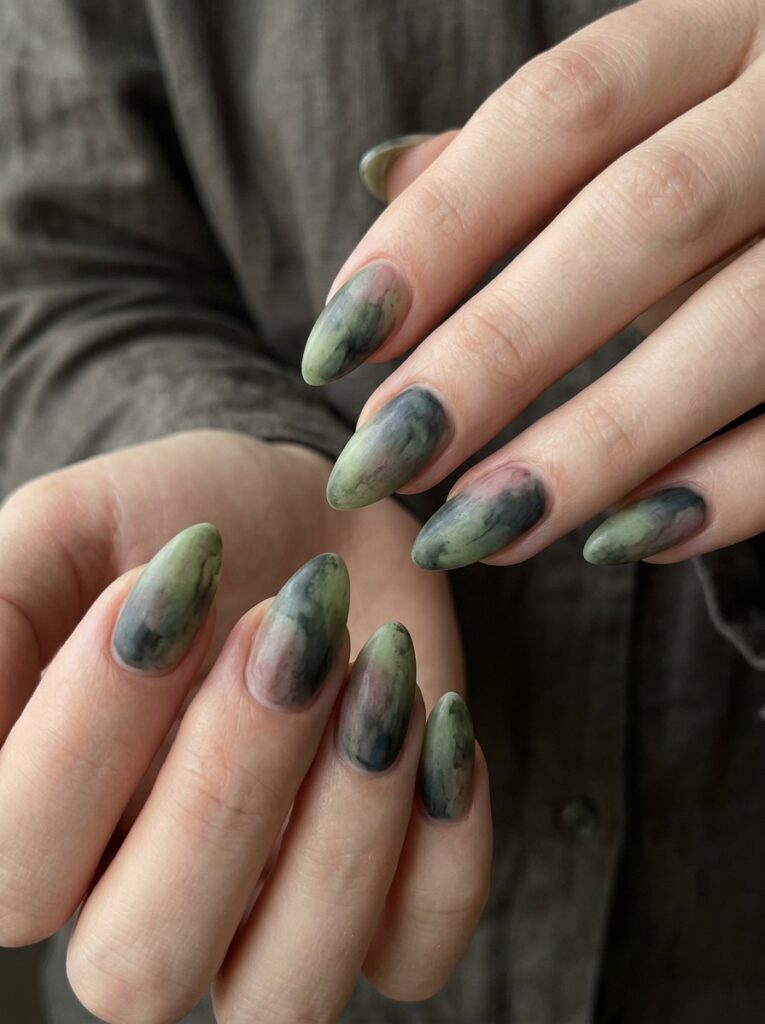
- On deeper skin tones, jewel-toned shades like oxblood, emerald, and deep plum tend to look especially rich, since the contrast between skin and polish adds depth rather than washing either one out.
- On lighter skin tones, near-black shades can sometimes read as heavy on their own, so pairing black with one warmer accent, like a small gold or copper detail, often balances the look.
- Milky whites and pale greys tend to be the most universally flattering neutral base across skin tones, which is part of why they show up so often as a canvas for line art.
- Pastel bases can occasionally wash out very fair skin if the shade is too close to the natural nail color. Adding even one small dark accent nail, like a black outline detail, usually fixes this without changing the overall palette.
None of this is a strict rule. It is simply worth testing a shade on one nail before committing an entire set to it, especially with darker or more saturated colors that behave differently once applied.
Finishes and Textures That Add Atmosphere Without Clutter
Once the color direction is settled, finish is the next lever worth pulling.
Matte Against Glossy
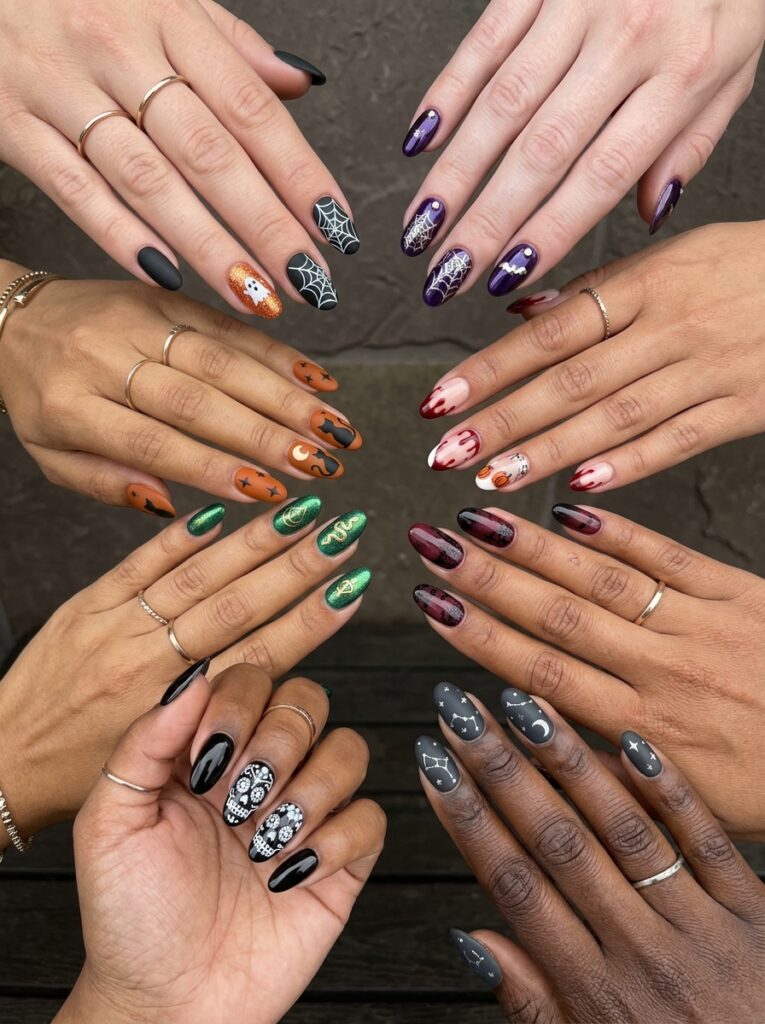
Pairing a matte base with one glossy accent nail, or the reverse, creates contrast without adding a single extra color. This is one of the simplest ways to make a plain set look considered, since the texture difference alone catches the light in two distinct ways.
Chrome and Cracked-Glass Effects
A chrome or cracked-glass topcoat over a dark base adds a fractured, almost frost-like texture that suits the season without relying on any literal Halloween imagery. This effect works especially well on one or two accent nails rather than across the full set, where it can start to look overwhelming.
Magnetic Cat-Eye Polish
Magnetic polish pulls pigment into a directional shimmer that shifts depending on the angle of light. On a black or deep green base, this creates a subtle, almost feline effect that fits a witchy theme without needing an actual cat painted anywhere on the nail.
Motifs That Feel Intentional, Not Costume Store
When a design does call for a recognizable image, the way it is placed matters more than the image itself.
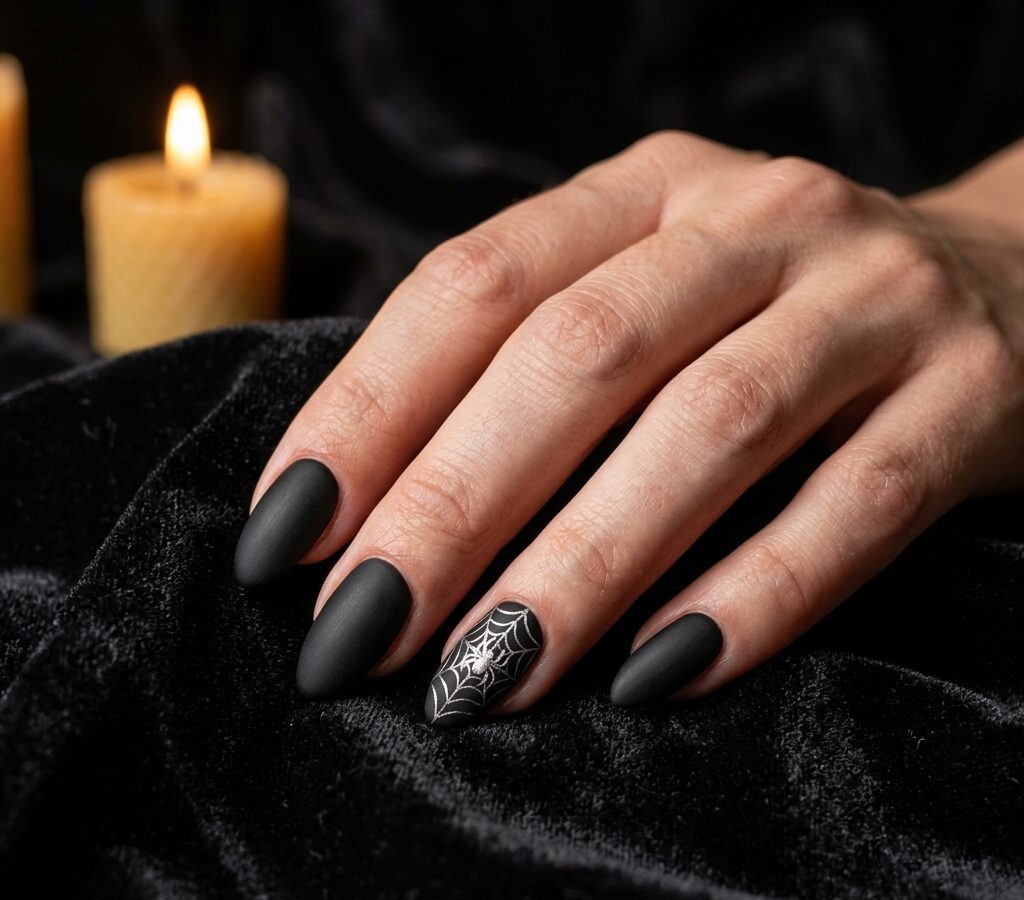
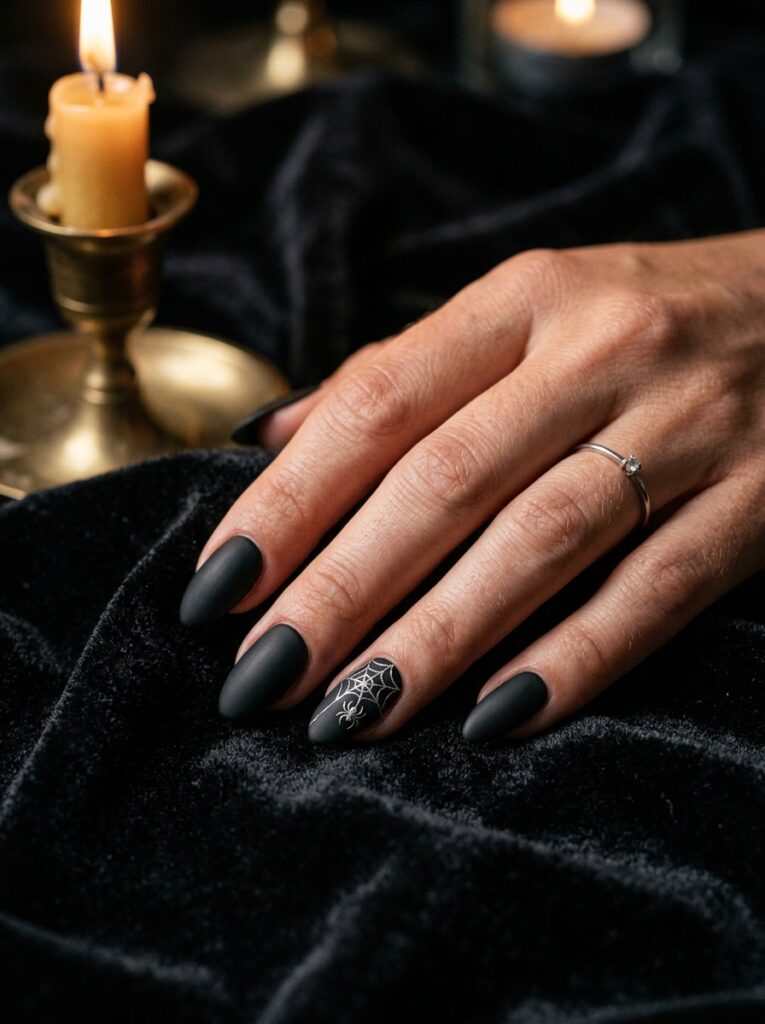
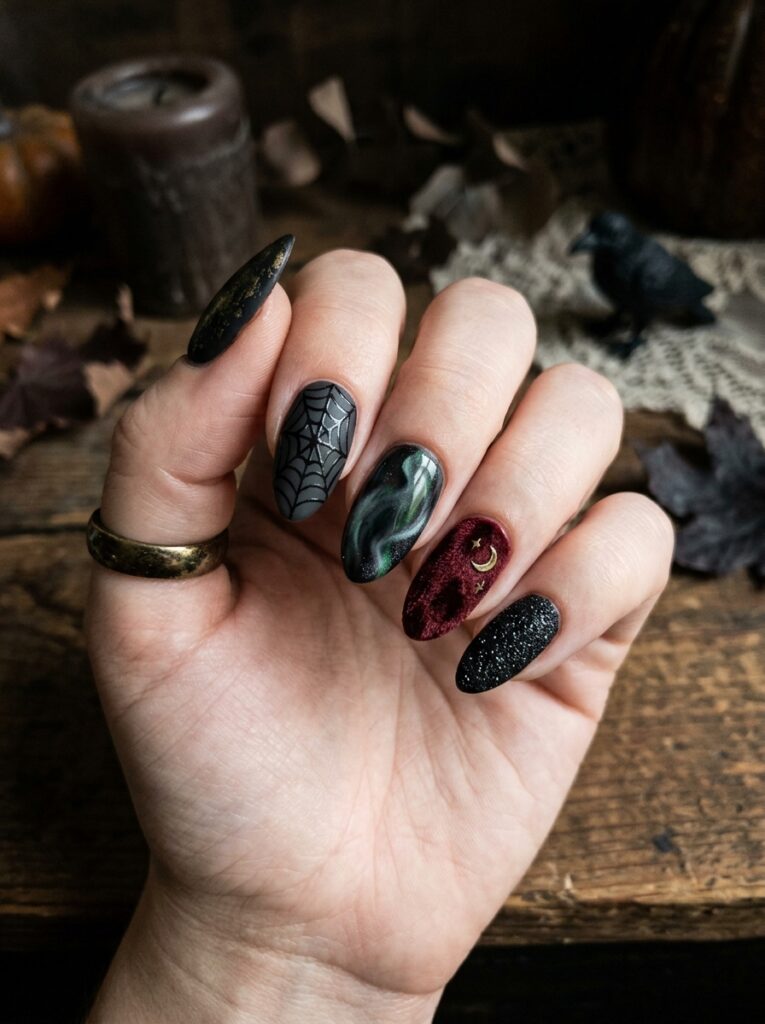
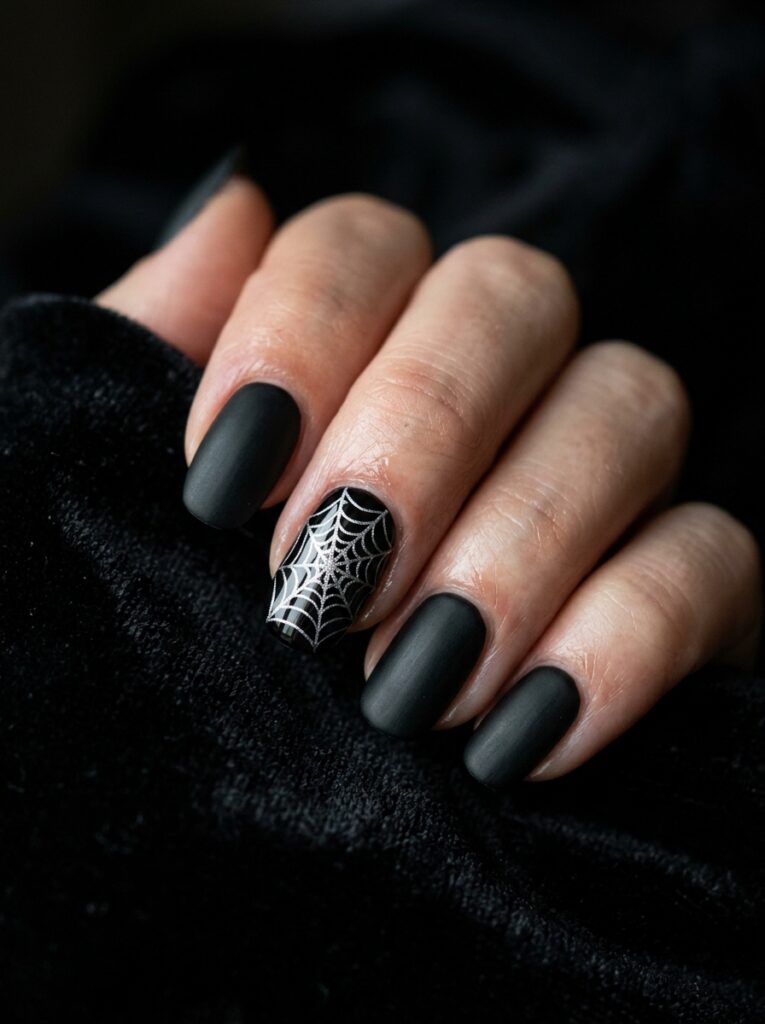
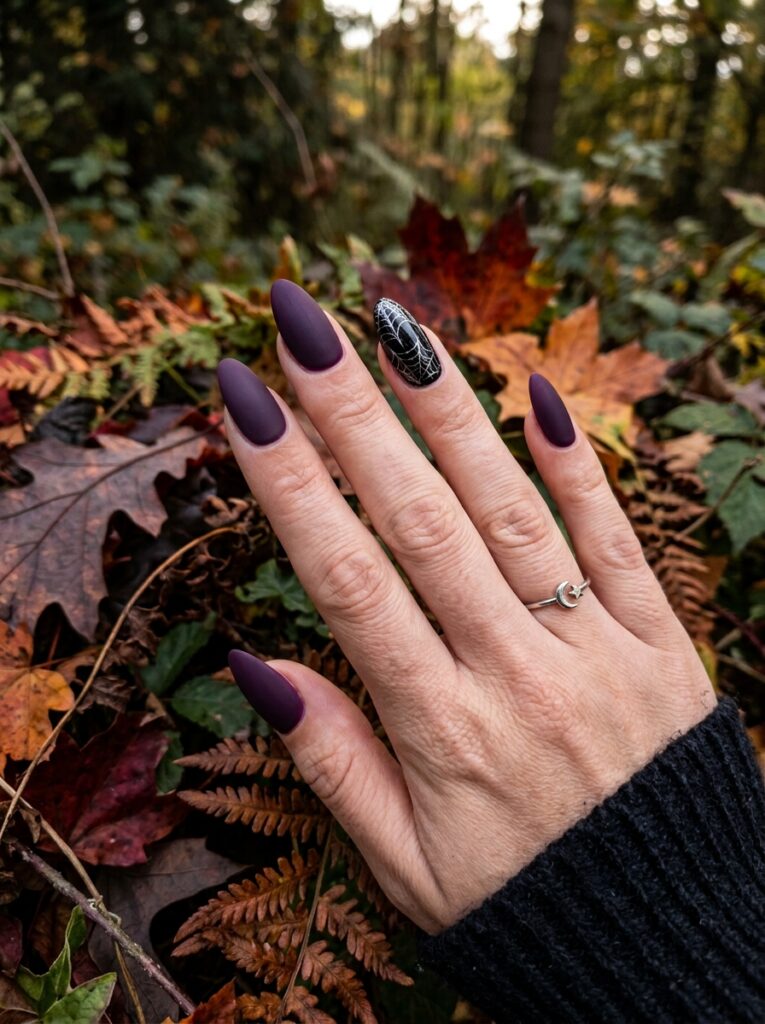
- Spiderweb line art. Fine, deliberate web lines in one corner of a single nail, rather than across all ten, tend to look elegant instead of childish. A metallic or white web on a dark base gives the cleanest contrast.
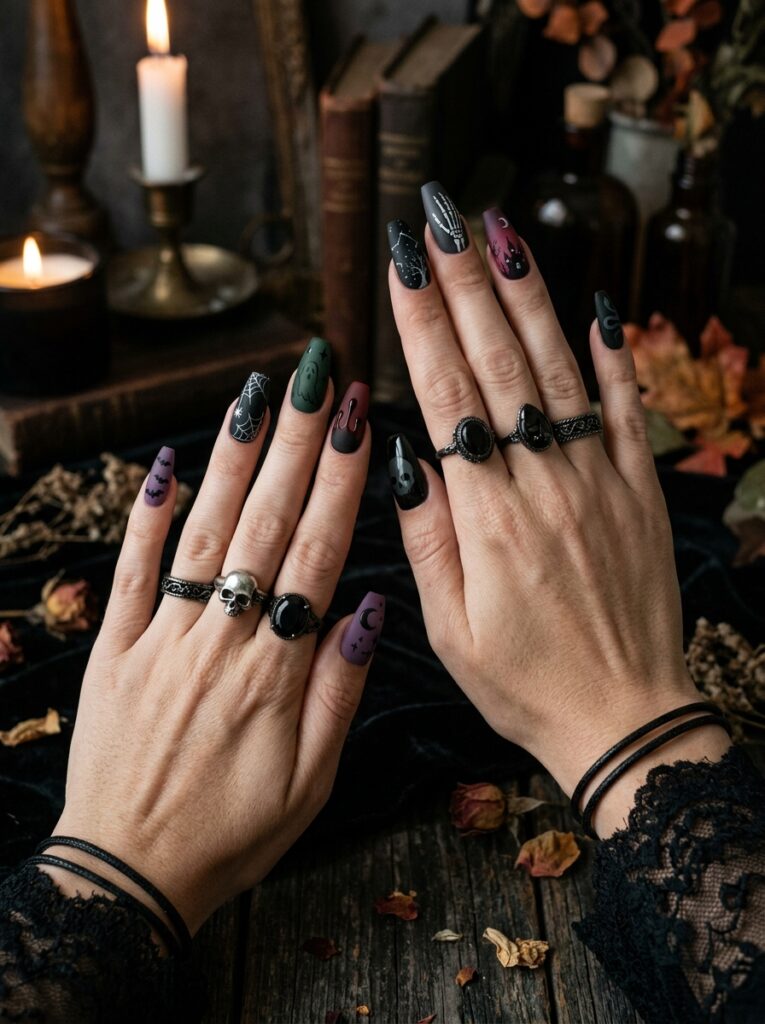
- Subtle bat silhouettes. Small, simple bat shapes placed near the cuticle or along one edge read as a quiet nod to the holiday rather than a costume element.
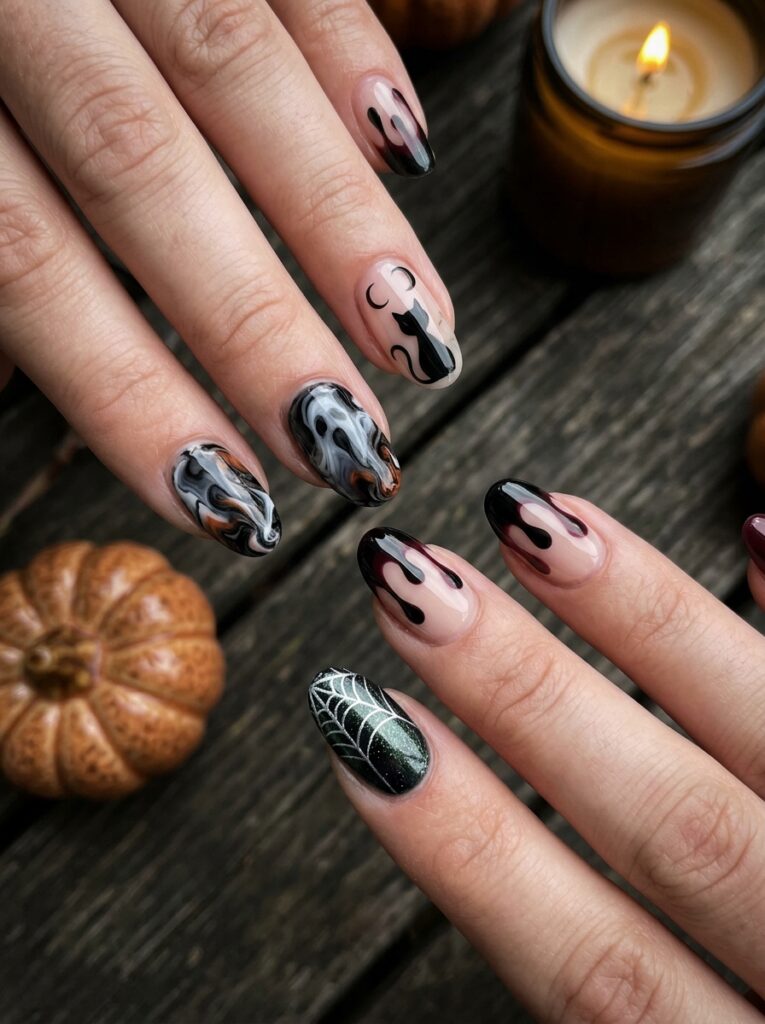
- Abstract drip effects. A soft, blurred drip in a dark red along the tip of one nail can suggest the classic Halloween “blood drip” idea without literal detail, which keeps it wearable outside a party setting.
- Moon phases and small symbols. A thin crescent moon, a tiny star, or a simple witch-adjacent symbol on an otherwise plain nail adds personality without requiring detailed hand painting.
The common thread across all of these is restraint. One motif, placed with intention, communicates the theme more effectively than the same motif repeated across every nail.
The One-Accent-Nail Rule
If there is one technique worth borrowing from professional nail artists heading into Halloween season, it is this: pick one nail to carry the detail, and keep the other nine simple.
This might mean nine solid oxblood nails and one with a spiderweb, or nine matte black nails and one with a cracked-glass chrome finish. The simple nails give the eye somewhere to rest, which makes the detailed nail stand out far more than it would if every finger were competing for attention.
This approach also happens to be faster and lower-maintenance, since only one nail requires careful linework or layered effects. For anyone doing their own nails at home, it is often the difference between a set that looks finished in twenty minutes and one that drags on for an hour with mixed results.
Shapes and Lengths That Suit a Spooky Look
The shape of the nail changes how a design reads almost as much as the color does.
- Coffin and almond shapes elongate the nail bed and suit gothic-leaning palettes like oxblood or matte black particularly well, since the longer surface gives line art more room to sit without feeling cramped.
- Short round or square shapes keep a design office-appropriate and low-maintenance, and they work well with subtle motifs like a single small bat or a thin web in one corner.
- Medium almond shapes sit in between, offering enough surface area for a simple accent design while still being practical for everyday tasks.
Longer, more dramatic shapes tend to suit party-focused looks, while shorter shapes suit sets meant to last through a full work week.
Nail Art Techniques Worth Trying at Home
A few techniques make it realistic to achieve a polished-looking spooky set without professional tools.
- Dotting tool details. A simple dotting tool, or even the rounded end of a bobby pin, can create small, evenly spaced dots for a minimalist take on a web or a cluster of tiny bats, without needing a fine brush or steady freehand skills.
- Stamping plates. Pre-etched stamping plates with web, bat, or moon designs let you transfer a clean, symmetrical image onto the nail using a scraper and stamper, which sidesteps the shaky-line problem entirely and gives a salon-level finish on a first attempt.
- Negative space. Leaving part of the natural nail bare, rather than covering every millimeter in polish, is one of the easiest ways to make a design look modern rather than dated. A simple painted outline around an unpolished center often reads as more sophisticated than a fully covered nail.
- Foil flakes. Pressing small pieces of metallic or glass foil onto a tacky topcoat adds a fractured, glass-like texture with very little skill required, which makes it one of the most forgiving techniques for a first attempt. A little goes a long way, so a few flakes scattered near the cuticle usually looks more refined than covering the whole nail.
- Striping tape. Thin adhesive striping tape can be used to mask off clean geometric lines before applying polish, which is a reliable way to get sharp negative-space shapes without a steady hand.
Starting with one of these techniques on a single accent nail, rather than attempting a full hand-painted scene, is the most reliable way to get a result that looks intentional.
Protecting Your Natural Nails Through the Season
Dark, pigmented polishes, especially deep reds and blacks, are more likely than lighter shades to leave a temporary stain on the natural nail if applied directly. A basic ridge-filling base coat underneath any dark color creates a barrier that helps prevent this, and it is a step worth not skipping even when a set feels simple.
After removing a Halloween manicure, nails and the surrounding cuticle area can feel a little dry, particularly if acetone-based remover was used. A small amount of cuticle oil massaged in after removal helps restore some of that moisture. Giving nails a short break between one polished set and the next also allows them to recover before the next design goes on, which keeps them looking healthier through the rest of the fall season.
DIY at Home or a Salon Visit: Which Fits Your Set
Some of the designs covered here are realistic to do yourself, and others benefit from a professional’s steady hand and proper tools.
- A single-color set with one accent using dotting tools, stamping plates, or foil flakes is very achievable at home, especially with some practice on a spare nail first.
- Detailed freehand line art, like fine spiderwebs or small painted silhouettes, tends to look noticeably cleaner when done by a nail technician with a fine detail brush, simply because of the steadier hand and finer tools involved.
- Chrome, cracked-glass, and magnetic cat-eye effects usually require specific powders, magnets, or gel systems that are more consistently available at a salon, though at-home versions of these products do exist for anyone who wants to experiment.
Matching the technique to your own comfort level and available tools tends to produce a better result than attempting a design that requires equipment or practice you do not yet have.
Halloween Nails for Different Settings
Not every Halloween set needs to serve the same purpose, and matching the design to where you will actually be wearing it makes a real difference.
Workplace-Friendly Spooky Nails
A neutral or deep solid base with one understated accent, a small moon, a thin web, a muted drip, tends to read as seasonal without drawing the kind of attention that might feel out of place in a professional setting.
Party-Ready Statement Nails
For a night out or a Halloween event, this is where chrome effects, magnetic cat-eye polish, or a longer coffin shape with bolder line art can take center stage without needing to worry about how the set reads in a meeting the next morning.
A Nod to Halloween for October Events
For anyone with a wedding or formal event landing in late October, a full costume-inspired set usually is not the goal, but a deep wine or oxblood manicure with a barely-there metallic detail can echo the season while still feeling appropriate for photos. Anyone planning nails around a wedding date might find it useful to browse bridal nail inspiration for ideas on how to keep a seasonal palette elegant rather than costume-like.
What Tends to Push a Design Into Tacky Territory
A handful of choices show up again and again in sets that miss the mark, even when the individual elements are not badly executed.
- Clashing neon brights. Neon orange next to neon green next to neon purple on the same hand rarely looks intentional, since the colors compete rather than complement each other.
- Overcrowded motifs. Ten different Halloween images across ten nails, ghosts, cats, pumpkins, spiders, candy corn, all at once, tends to look chaotic rather than festive.
- Novelty 3D pieces stacked too high. A single 3D charm can look striking. Several stacked on one nail, or repeated across the whole hand, usually looks cluttered and can also make the set impractical for daily tasks.
- Glitter without a clear boundary. Glitter applied edge to edge across every nail, rather than as an accent or gradient, tends to look heavy-handed rather than sparkly.
- Mismatched finishes with no logic. Randomly alternating matte, glossy, and glitter nail by nail without any pattern makes a set look unplanned, even if each individual nail looks fine on its own.
Avoiding these five habits solves most of the problem before it starts.
A Simple Approach for Planning Your Own Set
For anyone putting together a Halloween manicure, whether at a salon or at home, a short planning process tends to produce better results than picking designs at random.
- Choose one color direction: deep and moody, neutral with contrast, or soft pastel.
- Pick a single motif or effect to serve as the focal point of the set.
- Decide which one or two nails will carry that detail, and keep the rest solid or simple.
- Choose a finish, matte, glossy, chrome, or cat-eye, and apply it consistently across the set.
- Match the nail shape and length to where you will actually be wearing the set, whether that is an office, a party, or both.
Working through these five steps in order removes most of the guesswork, and it tends to produce a set that looks cohesive even without professional-level hand-painting skills.
Halloween nails do not have to choose between looking scary and looking good. A little restraint in color, one well-placed motif, and a finish that suits the mood you are going for is usually enough to land somewhere far more interesting than either a full costume-shop set or a plain black manicure with no personality at all.
If you want more ideas beyond Halloween, the seasonal nails collection covers looks for the rest of the year, and the general nail inspiration category is a good starting point for everyday manicure ideas as well.

Ella is a fashion and beauty writer who shares inspiring ideas about hairstyles, nail designs, wedding outfits, and seasonal fashion trends. She loves discovering fresh styles and creating…
View Author Profile →